
Padel court installation looks simple on paper: a 20m x 10m steel frame, tempered glass, mesh panels, turf, lights. In reality, the difference between a padel court that plays perfectly for 10+ years and one that develops loose bolts, cracked glass, and ponding water comes down to two things: the foundation underneath it, and the quality of the installation itself.
This guide is written for padel club owners and investors who are sourcing courts from a padel court factory and need to answer three practical questions before signing anything: what does padel court installation actually cost, what standards must the installation meet (indoor vs outdoor), and who does the installation work — the factory, or a local crew?
Everything below is based on the International Padel Federation (FIP) court regulations, the UK SAPCA Code of Practice for the Construction of Padel Courts (September 2025, 5th Edition), the LTA Padel Court Construction Guidance Note, and PanoCourt’s own factory installation manual used on real club projects.
Key facts up front:
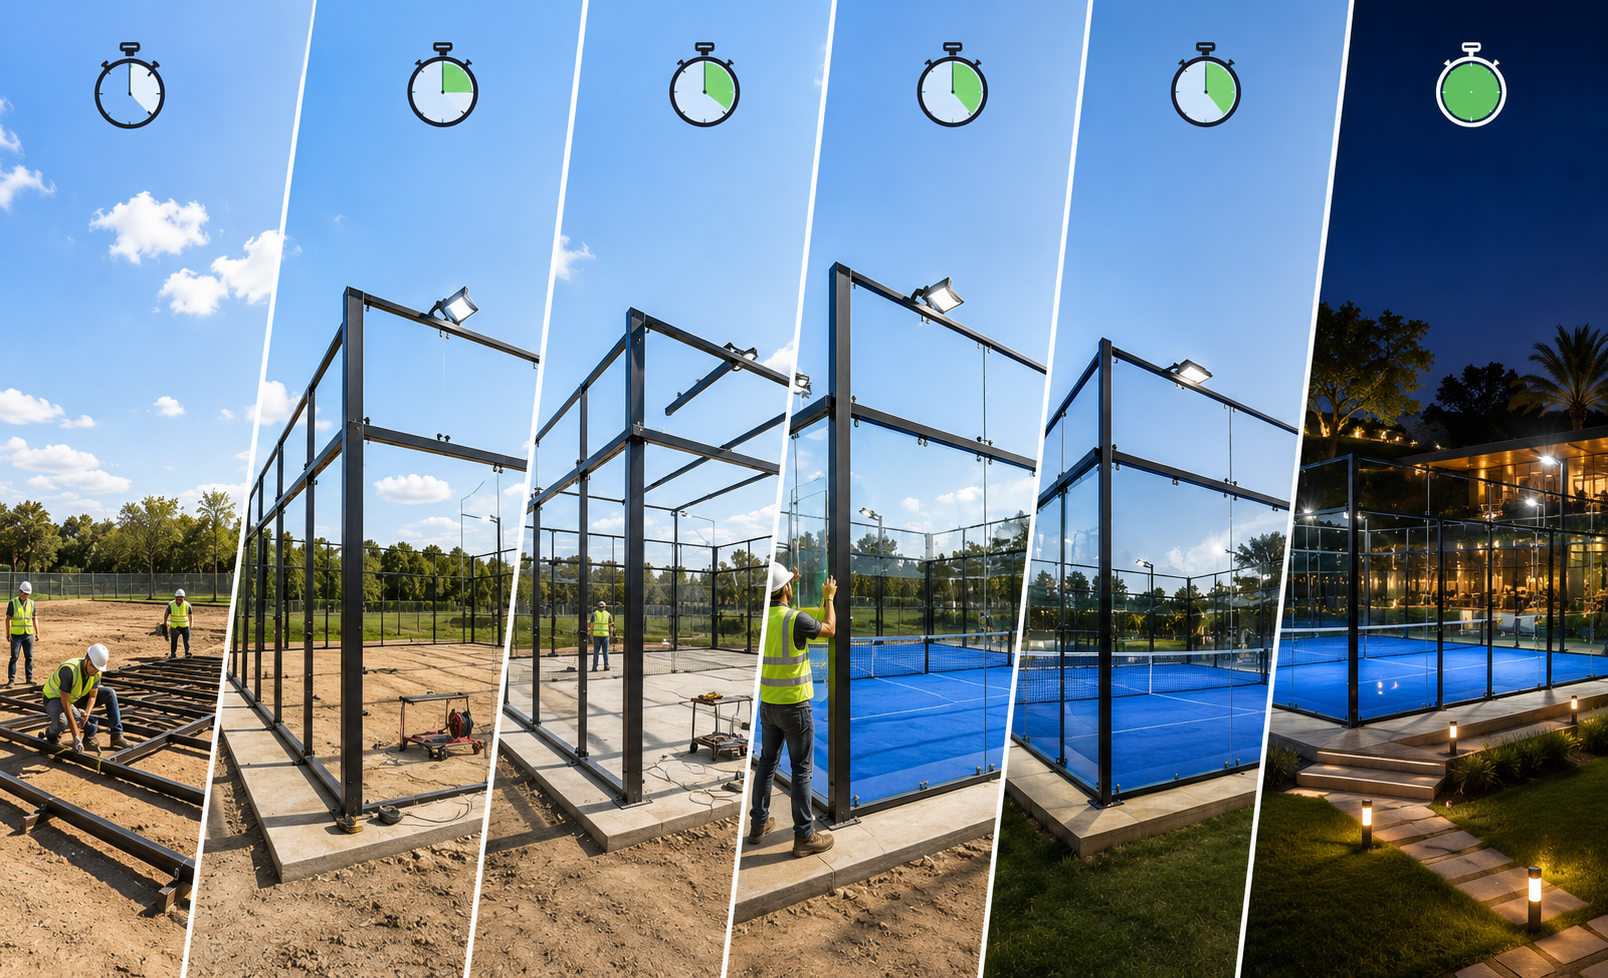
- A standard padel court installation requires approximately 4 workers and 5–7 working days, assuming the concrete foundation is already cured and level.
- Installation is only the last step. The foundation (ring beam or reinforced slab) must be engineered for local ground conditions and wind loads — this is a pre-condition, not an option.
- FIP requires a 20m x 10m playing area (0.5% tolerance), 4m total wall height (3m solid + 1m mesh), net at 88cm center / 92cm posts, and a minimum 6m clear height above the court.
- Labor is usually 10–25% of total project cost, but varies 5–10x between regions — which is exactly why many padel clubs buy from a padel court factory in China and hire local installers with factory video guidance.
- Glass must never touch steel directly. Every glass-to-steel contact point needs rubber gaskets or foam tape. This single detail causes more glass breakage claims than any other installation error.
Padel Court Installation Requirements and Standards (Indoor vs Outdoor)
Before any crossbeam is bolted together, the site itself decides whether your padel court installation will succeed. Both FIP rules and the SAPCA Code of Practice treat the padel court as a structure, not sports equipment — and structures need engineering. The table below summarizes the requirements every padel club should verify before ordering, and the differences between indoor and outdoor builds.
| Requirement | Indoor padel court | Outdoor padel court | Standard / Source |
|---|---|---|---|
| Playing area | 20.0m x 10.0m, tolerance 0.5%; PanoCourt outer flange rectangle 20.47m x 10.47m | FIP / PanoCourt manual | |
| Clear height above court | Minimum 6m to lowest obstruction (truss, duct, luminaire) | Minimum 6m under lighting; 8m over net line recommended for competition | FIP / SAPCA |
| Tempered glass thickness | 10mm acceptable; 12mm preferred | 12mm mandatory, certified/kitemarked, countersunk fixings | SAPCA 2.15.2 |
| Wall configuration | 4m total at rebound ends: 3m solid (glass) + 1m weldmesh; mesh 50x50mm, 3–4mm wire, horizontal face inward | FIP / SAPCA | |
| Foundation | Level reinforced slab; non-porous acceptable | Engineer-designed ring beam or slab calculated for local wind load; porous base build-up (~250mm aggregate + 40mm binder + 25mm surface asphalt) | SAPCA 2.7 / LTA |
| Surface flatness | ±3–6mm maximum deviation under a 3m straightedge | SAPCA 2.12.1 | |
| Drainage | Not required | Perimeter drain with outfall pipe through the ring beam; 1:100 fall to formation level if graded | SAPCA 2.6 |
| Steel corrosion protection | Powder-coated galvanized steel | Hot-dip galvanized + zinc electroplating; marine-grade coating for coastal sites; min. 3mm post wall thickness | SAPCA 2.15.1 |
| Lighting | 300 lux avg / 0.5 uniformity (recreational); 500 lux / 0.7 uniformity (national/international); 1.2–2.4kW per court, single-phase (three-phase for multi-court) | SAPCA Sec. 3 / LTA | |
| Net | 10m long; 88cm at center, 92cm at posts, ±5mm tolerance | FIP | |
| Wheelchair access | Minimum 1.2m between net post and enclosure on either side | LTA / SAPCA | |
| Court orientation | Not applicable | North–South longitudinal axis recommended to reduce sun glare | FIP |
| Planning permission | Building regulations for enclosed structures | Formal planning consent usually required (4m walls, 6m light poles); noise assessment if homes within 30–50m | LTA / SAPCA 2.1.2 |
Indoor Padel Court Installation
Indoor courts remove weather risk but add clearance and logistics constraints:
- Height is the hard gate. A minimum 6m clear height above the entire playing surface is a FIP requirement — including under any lighting or roof trusses. For professional-level play, 8m above the net line is the target.
- Access logistics matter more than people expect. A 3m x 2m tempered glass panel weighs roughly 180kg. Confirm your building’s doors, corridors, and floor loading can handle panel delivery and a glass lifter before the truck arrives.
- Non-porous concrete floors are acceptable indoors since there is no rain ingress — this simplifies the base compared to outdoor builds.
- Ventilation and 300 lux minimum lighting keep the court playable during long sessions.
Real-world insight: the most common indoor installation delay is not the court — it’s discovering mid-project that a roof truss or HVAC duct sits at 5.6m over one corner. Laser-measure the full 20m x 10m footprint at multiple points before ordering.
Outdoor Padel Court Installation
Outdoor padel court construction faces wind, rain, UV, and corrosion, so the requirements step up:
- Wind load engineering is mandatory. The foundation and post design must be calculated by a qualified structural engineer for the local wind zone — coastal and exposed sites need reinforced post sections. The factory should state the maximum windspeed the court is engineered to withstand.
- 12mm tempered glass only. SAPCA explicitly advises against 10mm glass outdoors due to wind loading.
- Drainage decides longevity. A porous asphalt base over compacted stone, plus a perimeter drain discharging through the ring beam, keeps the court playable within 15 minutes of rain stopping.
- All cable joints and switches must be fully enclosed, with cables run in UV-resistant corrugated conduit — no exposed connections.
- Any coating scratched during installation must be touched up immediately with matching zinc-rich paint to preserve the corrosion warranty.
Critical Padel Court Installation Precautions (Marked by Risk)
These are the precautions taken directly from the PanoCourt factory installation manual and the SAPCA Code of Practice. The items marked ⚠️ CRITICAL are the ones that cause real failures — cracked glass, structural rework, or safety incidents — when skipped.
| Risk level | Precaution | Why it matters |
|---|---|---|
| ⚠️ CRITICAL | Glass must never contact steel directly. Fit rubber gasket strips to the top and bottom edge of every panel; separate every other contact point with foam tape. | Direct glass-to-steel contact is the number one cause of tempered glass cracking after installation. |
| ⚠️ CRITICAL | Do not load anchor bolts into uncured concrete. Wait for the slab/ring beam to reach design strength (typically 21–28 days) before drilling expansion anchors. | Anchors in green concrete pull out under wind load; re-anchoring means dismantling the frame. |
| ⚠️ CRITICAL | Mesh wire must face the inside of the court on every panel, with the horizontal wires inward. | Reversed mesh gives irregular ball rebound and exposes wire ends to players. |
| ⚠️ CRITICAL | Observe left/right orientation of the 10m and 20m upper/lower crossbeams during sub-assembly — label every component at unpacking. | A mirrored crossbeam discovered at step 8 means dismantling half the frame. |
| ⚠️ CRITICAL | Square and plumb the entire frame before drilling any expansion anchors. | Anchor holes are permanent; an out-of-square frame cannot be corrected afterwards. |
| ⚠️ CRITICAL | Electrical safety: main breaker + RCD for 2+ courts, sub-breaker per court, all joints fully enclosed, UV-resistant conduit throughout. | Exposed outdoor connections are a shock/fire hazard and fail inspection. |
| Important | Inspect every glass panel for chips and every steel member for coating damage before installation; reject damaged glass, touch up steel with zinc-rich paint. | Edge chips in tempered glass propagate into full-panel shattering. |
| Important | Keep glass panel separation gaps between 3mm and 6mm, uniform along the joint. | Under 3mm panels strike each other with thermal expansion; over 6mm creates finger traps and rebound faults. |
| Important | Tension the net to 905±5mm at the ends and 865±5mm at the center using the cable tensioner. | Matches the FIP 92cm/88cm rule within tolerance. |
| Important | Glass and weldmesh internal faces must finish flush — neither surface protruding. | Any step between surfaces deflects the ball and injures players. |
| Important | Torque-check every bolt at handover, then monthly and after every storm. | Loose fixings void the structural warranty and compromise the enclosure. |
How Padel Court Installation Cost Is Calculated
Total installation cost = labor + groundworks (foundation, drainage, electrical) + tools and equipment rental + logistics. The court hardware itself is a separate line — see our padel court manufacturer price list and the full padel court cost breakdown for club investors for that side of the budget.
Labor Cost: 4 Workers, About 7 Days
A standard panoramic or classic court needs a crew of approximately 4 workers for 5–7 working days (roughly 25–30 man-days): frame erection 2–3 days, glass installation 1.5–2 days, mesh/doors/net/lighting 1–2 days, turf laying plus sand infill 1–2 days. Multi-court projects gain efficiency — a second court on the same site rarely doubles the time.
Wages vary enormously by region. Indicative average rates for skilled sports-construction installers:
| Region | Avg. daily wage per installer (USD) | Est. labor for 1 court (4 workers x 7 days) |
|---|---|---|
| Western Europe (UK, NL, DE, ES) | $180 – $280 | $5,000 – $7,800 |
| North America (US, CA) | $220 – $350 | $6,200 – $9,800 |
| GCC / Middle East (SA, UAE) | $70 – $150 | $2,000 – $4,200 |
| East & Southeast Asia | $40 – $100 | $1,100 – $2,800 |
| Latin America | $50 – $110 | $1,400 – $3,100 |
| Africa | $35 – $90 | $1,000 – $2,500 |
| Oceania (AU, NZ) | $250 – $380 | $7,000 – $10,600 |
Rates are indicative 2025–2026 market averages and vary by city, season, and whether a crane or lift operator is included. Always add a supervisor day rate and 10–15% contingency. For region-specific budgets, see our guides on building a padel court in South Africa and padel court projects in the UAE and Saudi Arabia.
Ground Conditions: Concrete, Sand, and Drainage
The foundation is usually the largest single cost after the court itself, and it is entirely site-dependent:
- Concrete ring beam or slab: a perimeter reinforced ring beam (nominal 400mm width) or a full reinforced slab — roughly 12–20 m³ of concrete plus steel reinforcement for a single court, engineered to local ground conditions.
- Sub-base aggregate: ~250mm of compacted, free-draining, non-frost-susceptible stone under the playing area.
- Silica sand infill: typically 3–5 tonnes of kiln-dried silica sand brushed into the turf pile per court.
- Drainage: perimeter drain, outfall pipe through the ring beam, and attenuation where local rules restrict discharge to soakaways.
- Curing time: plan the installation crew’s arrival around the 21–28 day concrete cure. Flying installers in before the slab is ready is the most expensive scheduling mistake in this industry.
As a data point, the UK LTA’s 2025 delivered-project figures put groundworks (ring beam, base, ducting, drainage) at roughly the same cost as the court itself — about £35,000 groundworks vs £36,000 for one court with lights. In lower-cost regions the groundworks share drops significantly, but it is never negligible.
Padel Court Installation Tools Checklist with Prices
Based on the PanoCourt factory tooling list, this is the complete kit a 4-person installation crew needs, with indicative purchase prices (China market, converted at ~7.2 CNY/USD; local prices vary). A local installation company should already own most of this — use the checklist to vet them.
| Category | Tool / Equipment | Purpose | Est. price (USD) | Notes |
|---|---|---|---|---|
| Measuring & layout | Total station | Precise site positioning and coordinate setting-out | $2,100 – $5,600+ | High-precision instrument — rent or bring a survey team |
| Laser level | Levelness and gradient checks | $110 – $420 | Rotary laser costs more than line laser | |
| 50m steel tape | Long-distance measurement of the 20.47 x 10.47m rectangle | $7 – $21 | Steel, non-stretch professional grade | |
| Chalk line / ink box | Marking reference lines | $3 – $11 | Consumable, includes ink | |
| 2m spirit level / straightedge | Verticality and flatness checks | $14 – $42 | Aluminum; calibrate regularly | |
| Steel structure | Heavy-duty hammer drill | Drilling the concrete foundation for anchors | $110 – $350 | High power; Bosch/Makita class recommended |
| Electric / torque wrench | Tightening high-strength bolts to spec | $70 – $210 | Torque setting required for structural safety | |
| Hex (Allen) key set | M8/M10 socket button-head bolts | $7 – $28 | Ball-end, hardened set recommended | |
| Angle grinder | Cutting and dressing steel | $28 – $85 | With cutting and grinding discs | |
| DC inverter welder | On-site welding (if needed) | $110 – $280 | Optional — PanoCourt courts are fully bolted; rent if required | |
| Scaffold tower / lift platform | Work at 3–6m (mesh frames, lamp arms) | $280 – $1,100+ | Lift rental ~$42–110/day is often cheaper | |
| Glass installation | Vacuum glass suction lifters | Handling and positioning 12mm tempered panels (~180kg) | $28 – $110 each | Core safety tool — carry 2–4 units, dual or quad cup |
| Glass clamps / lifting frame | Assisted hoisting | $70 – $210 | Crane work needs dedicated rigging; manual installs can use simple clamps | |
| Rubber mallet | Fine adjustment of glass position | $4 – $11 | Never strike glass edges with metal | |
| Conical washers + hex screws | Glass fixing sets | $0.7 – $2 /set | Consumable — order per glass hole count; stainless costs more | |
| Mesh & fence | Cable tensioner | Tensioning fence wire and net cable | $7 – $21 | Used with steel wire rope |
| Wire cutters / pliers | Trimming wire, fastening clips | $4 – $14 | Leverage-assisted type recommended | |
| Screwdriver set (electric) | Mesh fixing screws | $14 – $70 | Electric driver is far faster | |
| 304 stainless screws + washers | Mesh fasteners | $0.07 – $0.28 /pc | Bulk consumable — check rust grade | |
| Surface works | Mixer / paddle drill | Mixing acrylic or concrete | $42 – $110 | High-power mixing gun with bucket |
| Floor grinder | Base surface grinding | $210 – $560 | Heavy floor grinder — rentable | |
| Trowels / squeegees | Leveling surface materials | $7 – $28 | Multiple notch sizes needed | |
| Rollers / brushes | Primer and top-coat application | $3 – $14 | Consumable — stock plenty | |
| Flatbed cart | Material transport | $14 – $42 | Heavy-duty load rating | |
| General & safety | Expansion anchor bolts (M12x100+) | Post and flange fixing | $0.3 – $0.7 /pc | Hot-dip galvanized or stainless only |
| Anti-rust / zinc paint | Weld point and scratch protection | $7 – $21 /tub | Small tub sufficient | |
| PPE (per worker) | Helmet, harness, hi-vis, gloves | $28 – $70 /person | Mandatory | |
| Pressure washer | Site clean-up and later maintenance | $70 – $210 | Also useful for glass cleaning |
Budget takeaway: excluding the total station and welder (rent instead) and renting the lift, a crew can assemble the full core toolkit for roughly $1,100 – $2,800. If a prospective installation company cannot show you vacuum glass lifters and a torque wrench, keep looking — those two tools separate glaziers from guessers.
Which Padel Court Factory Provides Installation Service?
Most padel court factories — Spanish and Chinese alike — do not maintain permanent installation crews in every country. What separates a good factory from a risky one is how well it supports the installation, whichever model you choose. (Before comparing installation offers, make sure you are dealing with a real manufacturer at all — here is how to verify a China padel court manufacturer, and how Spain vs China supply chains compare for UK padel clubs.)
PanoCourt: Two Installation Options
As a padel court factory, PanoCourt offers two installation options for every project:
Option 1 — Guided self-installation (most popular). We send you a complete installation video plus the illustrated installation manual, and our engineers provide real-time guidance over WhatsApp/video call throughout the build. You hire a local installation company or steel/fencing crew — the assembly is fully bolted (no on-site welding), so any competent local team can execute it.
Option 2 — Factory installation team dispatched to your site. We send our own experienced installers to lead or perform the installation. The client covers all crew costs: visas, air tickets, accommodation, and daily wages.
| Option 1: Local crew + factory video guidance | Option 2: PanoCourt team on site | |
|---|---|---|
| Typical cost (1 court) | Local labor only (see wage table above) — e.g. $2,000–$8,000 depending on region | Crew wages + flights + visas + hotel; typically $8,000–$15,000+ depending on destination and duration |
| Timeline | 5–7 days once crew is booked | 7–10 days including travel and mobilization |
| Best for | Padel clubs with access to local steelwork/fencing contractors; cost-sensitive projects; GCC, Africa, SE Asia | First-time multi-court clubs; markets with no experienced local crews; flagship venues |
| Quality assurance | Factory remote supervision + photo checkpoints at each step | Direct factory workmanship |
| Hidden-cost risk | Low — you control local rates | Travel costs rise with distance and visa complexity |
Real-world insight: for a 2–4 court project, a hybrid model often works best — one PanoCourt supervisor flies out to lead a local crew of 3–4 workers. You get factory-standard quality control at a fraction of the cost of a full imported team.
How to Vet a Local Installation Company: 6-Point Checklist
- Ask for photos of at least one completed padel or glass-fence project — steel fencing, curtain-wall, or shopfront glazing experience transfers well.
- Confirm they own (not “can rent someday”) vacuum glass lifters and a torque wrench.
- Ask how they isolate glass from steel — if the answer is not “rubber gaskets and foam tape,” walk away.
- Confirm a licensed electrician handles the lighting circuit, breaker, and RCD.
- Get the crew size and day count in writing (benchmark: 4 workers, 5–7 days per court).
- Require photo checkpoints at frame-square, pre-glass, and pre-turf stages so the factory can verify remotely.
Padel Court Installation Steps: The 8-Stage Sequence
This is a condensed version of the PanoCourt installation sequence (the full 26-page illustrated manual and video ship with every order):
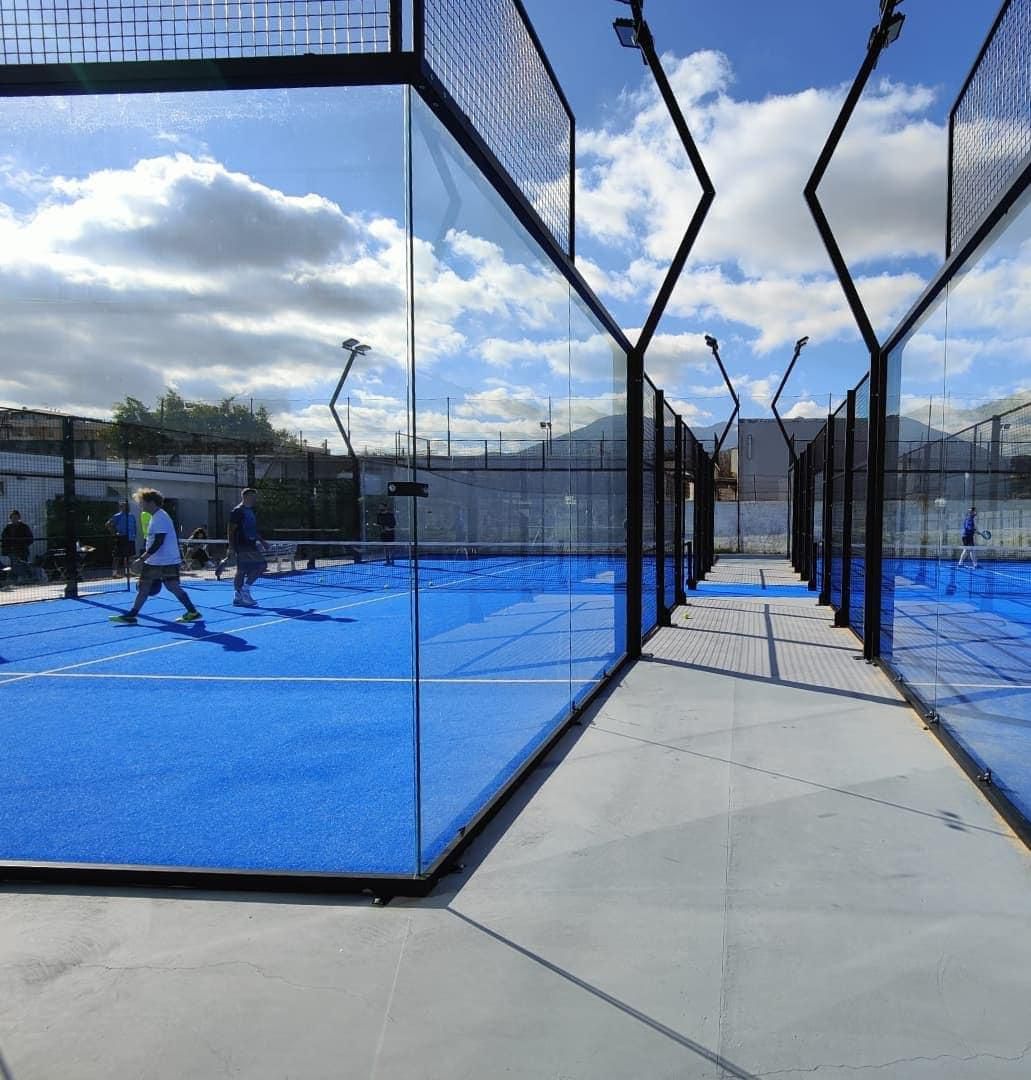
- Site layout. Using a 50m tape, mark the 20.47m x 10.47m outer flange rectangle on the cured slab, with perpendicular corner lines and the center line verified.
- Unpack and label. Mark every component during unpacking to prevent mix-ups — crossbeams and posts have left/right orientations that matter.
- Sub-assemble crossbeams. Pre-assemble the 10m upper/lower and 20m upper/lower crossbeam groups on the ground before erecting anything.
- Erect the main frame. Start at any corner: stand the corner post, bolt on the 20m lower crossbeam (M10x25), then the 10m lower crossbeam assembly, then light poles and upper crossbeams. Repeat around the court; connect mesh panels (mesh wire facing the inside of the court), door frames, and doors. Square and plumb the entire frame, then drill and set the expansion anchors through every flange plate.
- Upper mesh frames and lamp arms. Fix upper mesh frames with M10x50 bolts, corner connectors with M10x40. Mount luminaires to brackets (M10x65), brackets to light poles (M10x75), and route cables through the pole conduit to the pre-buried underground supply.
- Tempered glass panels. Fit rubber gasket strips to the top and bottom edge of every panel first. Start with the corner panels, seat them in the post and crossbeam slots (glass on the inside face), and secure with M8x30 bolts through the bracket tabs. Wherever glass would touch steel without a gasket, separate it with foam tape.
- Net and net posts. Align the inner faces of the net posts flush with the inner fence line, anchor to the ground, hang the net, and tension the cable to 905±5mm at the ends and 865±5mm at the center.
- Electrical and handover. Install the main breaker and RCD (multi-court sites), a sub-breaker per court, enclose every joint, sheath all cabling in UV-resistant conduit, then clean the site completely before first play.
After installation: check anchor points and all bolt torques monthly (and after any storm), brush the turf to redistribute sand, and keep the glass panel gaps between 3mm and 6mm — this maintenance discipline is what keeps a 10-year structural warranty valid.
FAQ: Padel Court Installation for Padel Clubs
How long does padel court installation take?
About 5–7 working days with a 4-person crew for one court, after the concrete foundation has fully cured. Add 3–4 weeks upfront for foundation works and curing, and allow 4–6 weeks for sea freight if buying from a padel court factory in China.
How much does it cost to install a padel court?
Labor alone runs $1,000–$10,600 per court depending on region (see the wage table above). Add groundworks — in high-cost markets the foundation, drainage, and electrical can equal the price of the court hardware itself. Full project budgets are covered in our complete padel court cost breakdown.
Can I install a padel court on an existing tennis court or car park?
Often yes, but never without an engineering check. An existing asphalt tennis base usually needs a gradient survey, drainage piercing, and a new engineer-designed foundation for the enclosure posts. Steel-plate or weighted-platform systems exist for hard standings, but they still require site-specific structural calculations.
Do I need a structural engineer?
For outdoor courts, yes — foundation and wind-load design signed off by a local qualified engineer is required by SAPCA/LTA guidance in the UK and is best practice everywhere. Your factory should supply the maximum wind-load rating of the enclosure to feed into that design.
What is the most common padel court installation mistake?
Two tie for first place: loading anchor bolts into concrete that hasn’t cured, and letting tempered glass touch bare steel. Both cause failures months later, not on day one.
Does PanoCourt provide installation?
Yes — either remote-guided installation (video + manual + live engineer support for your local crew) or a dispatched factory team where the client covers visas, flights, accommodation, and wages. Roughly 80% of our overseas clients choose the guided option and complete installation successfully with local labor.
What warranty should I expect on the installed court?
Industry guidance (LTA/SAPCA) recommends a minimum 10-year warranty on the court structure, with steelwork corrosion warranties of 5–15 years. Manufacturer warranties cover component failure — the foundation warranty comes from your structural engineer and groundworks contractor, which is another reason to get that design done properly.
PanoCourt is a padel court factory based in Tianjin, China, manufacturing FIP-standard panoramic and classic padel courts with 12mm tempered glass, hot-dip galvanized steel, and full installation documentation in English. Contact us at macy@panocourt.com or WhatsApp +86 13681235010 for a project quotation including installation support.